


.png?w=100&itok=wKdP9svH)


.png?w=100&itok=D7d8Umfz)

.png?w=100&itok=Lj7SSICT)


Drill into timber, soft metal and hard materials including brick and concrete with the RYOBI 18V ONE+ Hammer Drill.
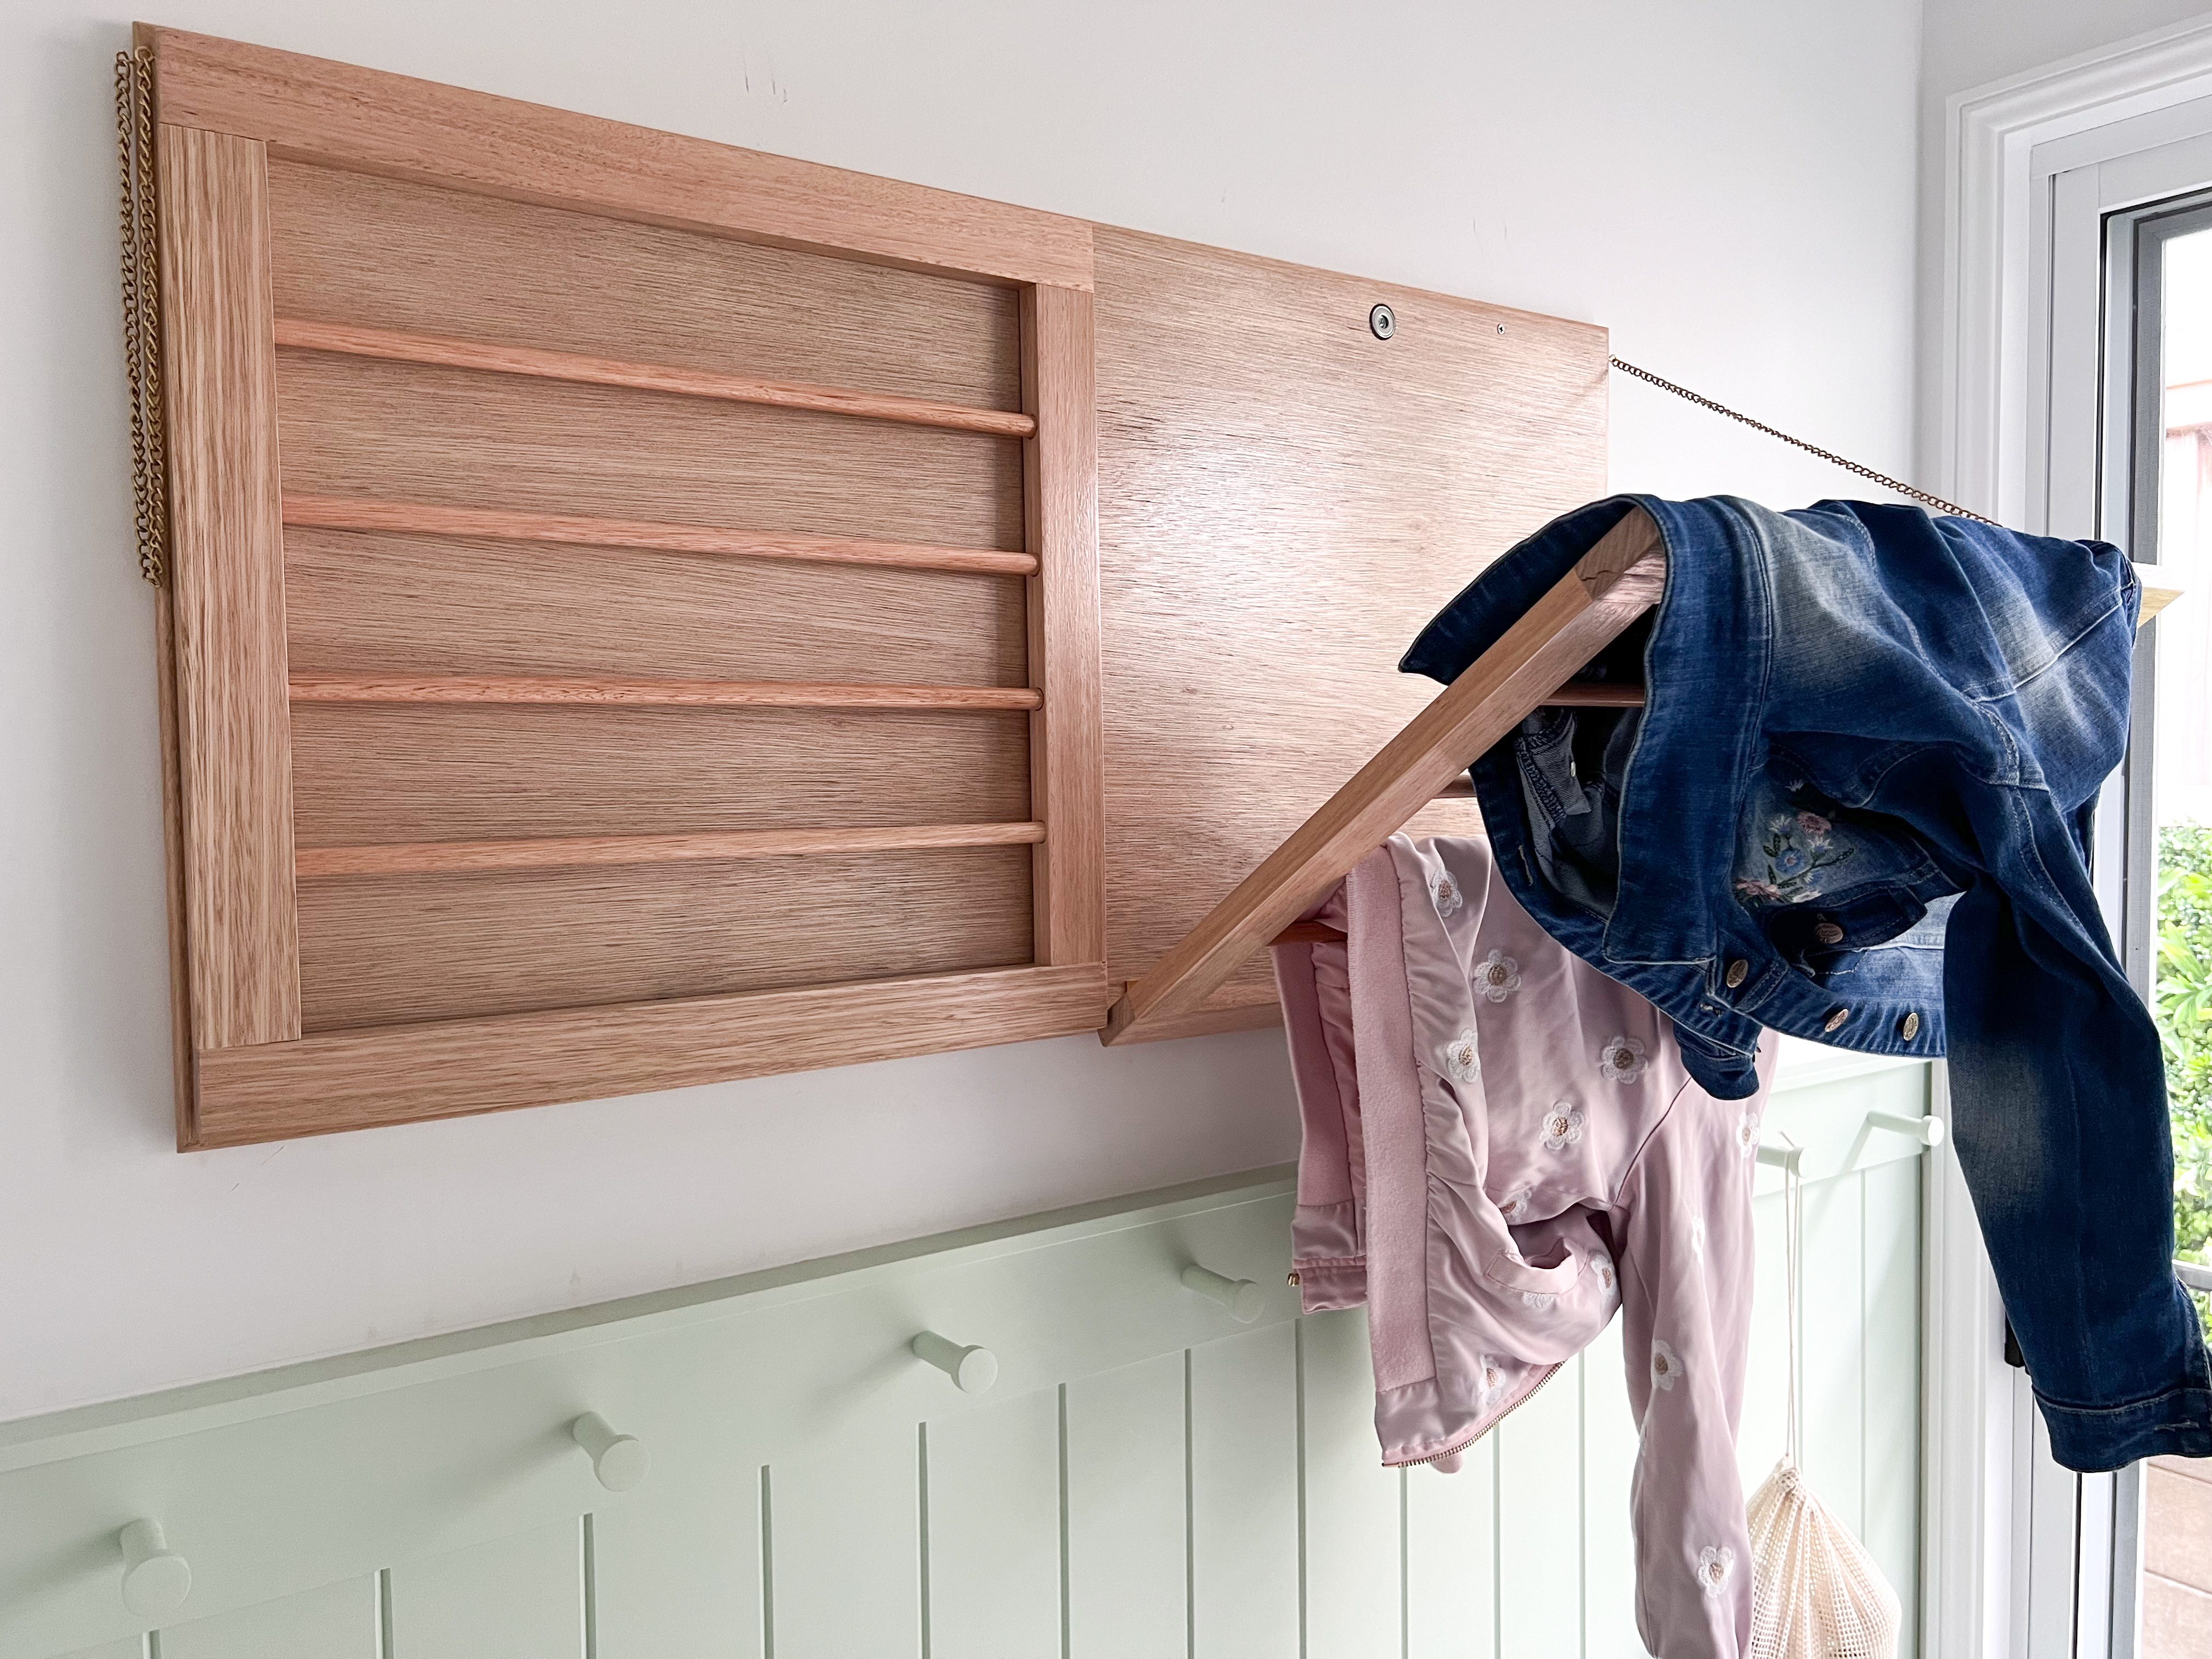
When it’s damp and raining outside, drying clothes can be a challenge. This Wall-mounted Clothes Drying Rack will prove to be very handy, adding functionality and style to your space. Read the step-by-step instructions below and watch the video for full instructions.
Step 1: Measure the size of wall space you have and determine what size drying rack that you would like.
Step 2: Mark out your drying rack measurements on a 12mm thick piece of plywood using a tape measure and a square.
Step 3: Using the circular saw, cut the backing piece to size.
Step 4: Using the mitre saw set to a 45o bevel - cut the semi-round-dowel to size (this will hide the visible edges of the plywood).
Step 5: Glue the dowel around the outside of the plywood. Use painters tape to hold the pieces in place while they dry.
Step 6: Measure the 42mm x 19mm DAR against the top and bottom of the backing piece. Then use the mitre saw to cut the pieces.
Step 7: Next, cut these two pieces in half - these will be the two tops and two bottoms of the racks.
Step 8: Lay them on the backing piece and measure the upright pieces that will join the tops and bottoms AND hold the pieces of dowel in place.
Step 9: Cut these to size with the mitre saw.
Step 10: Grab the 12mm round dowel and measure the length against the squares you have just cut to size. Again, use the mitre saw to cut these to size - 4 per rack, 8 in total.
Step 11: Using a 12mm spade bit in the hammer drill - drill the 16 holes for the dowels to sit in. They only need to be a few mm deep.
Step 12: Next drill pocket holes with the hammer drill to screw all of the pieces together. Using the impact driver secure them all together (remember to also have the dowels in place before screwing the squares together).
Step 13: Now is a good time to stain, paint, seal or whatever else you would like to do to the timber.
Step 14: Using the hammer drill and impact driver attach the magnets and hinges.
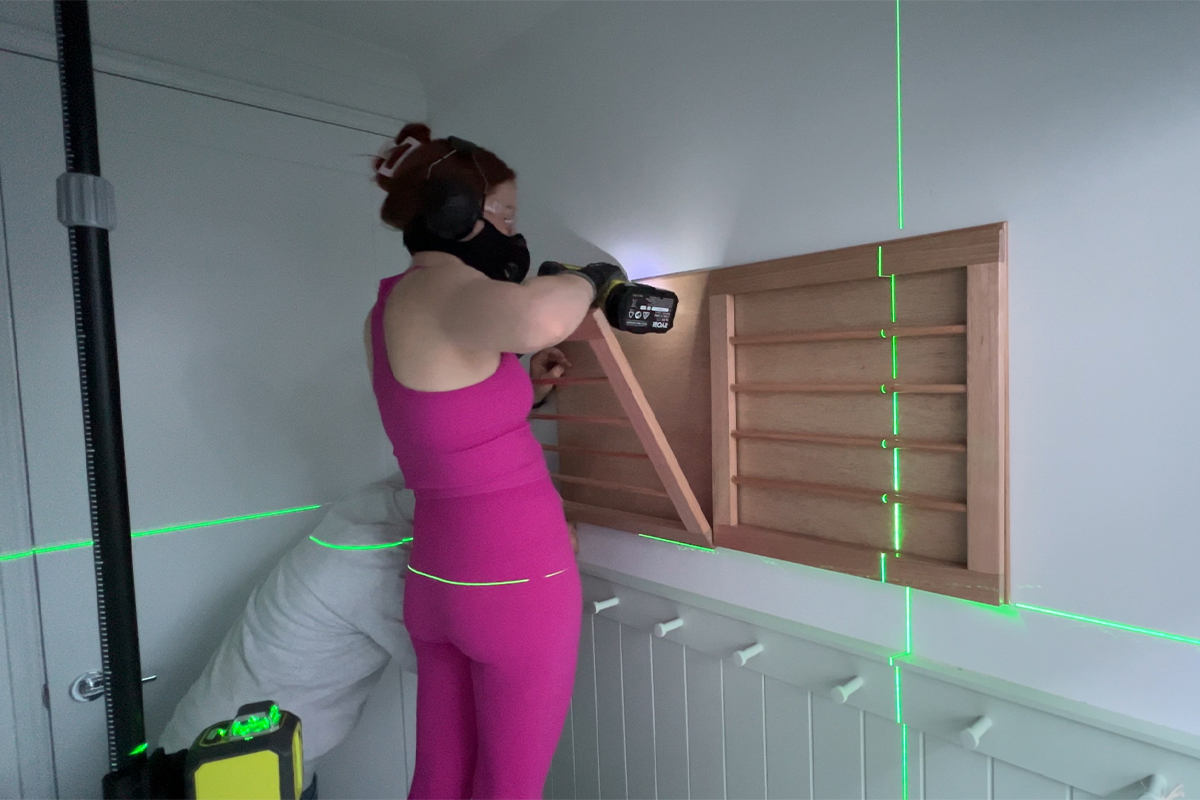
Step 15: Using the Laser line level and pole - mount the drying rack on the wall by drilling pilot holes with the hammer drill and then screwing into the studs (vertical timber framing behind the plasterboard wall) with the impact driver.
Step 16: Last step is to attach screw-in eye hooks and chain that has been cut to your desired length.
Step 17: Caulk around the edges for a great-looking finish.

Feeling creative but lacking ideas? We’ve got you covered! Watch our videos and follow the step-by-step instructions to unleash your creativity.


.png?w=100&itok=Md9-7E8t)


%20(2).png?w=100&itok=fEHREjki)
_ANZ-Group-shot_v2.png?w=100&itok=Z_Qi2FlQ)
_ANZ-Group-shot.png?w=100&itok=k25pq8iJ)


.png?w=100&itok=fnsLcLhG)


.png?w=100&itok=efvsqCNL)


%20Group%20shots%20(1).png?crop=yes&k=c&w=125&h=125)


.png?crop=yes&k=c&w=690&h=690&itok=J5F8BAY0)


.png?crop=yes&k=c&w=690&h=690&itok=XNeI_VJt)