


.png?w=100&itok=wKdP9svH)


.png?w=100&itok=D7d8Umfz)

.png?w=100&itok=Lj7SSICT)


Drill into timber, soft metal and hard materials including brick and concrete with the RYOBI 18V ONE+ Hammer Drill.
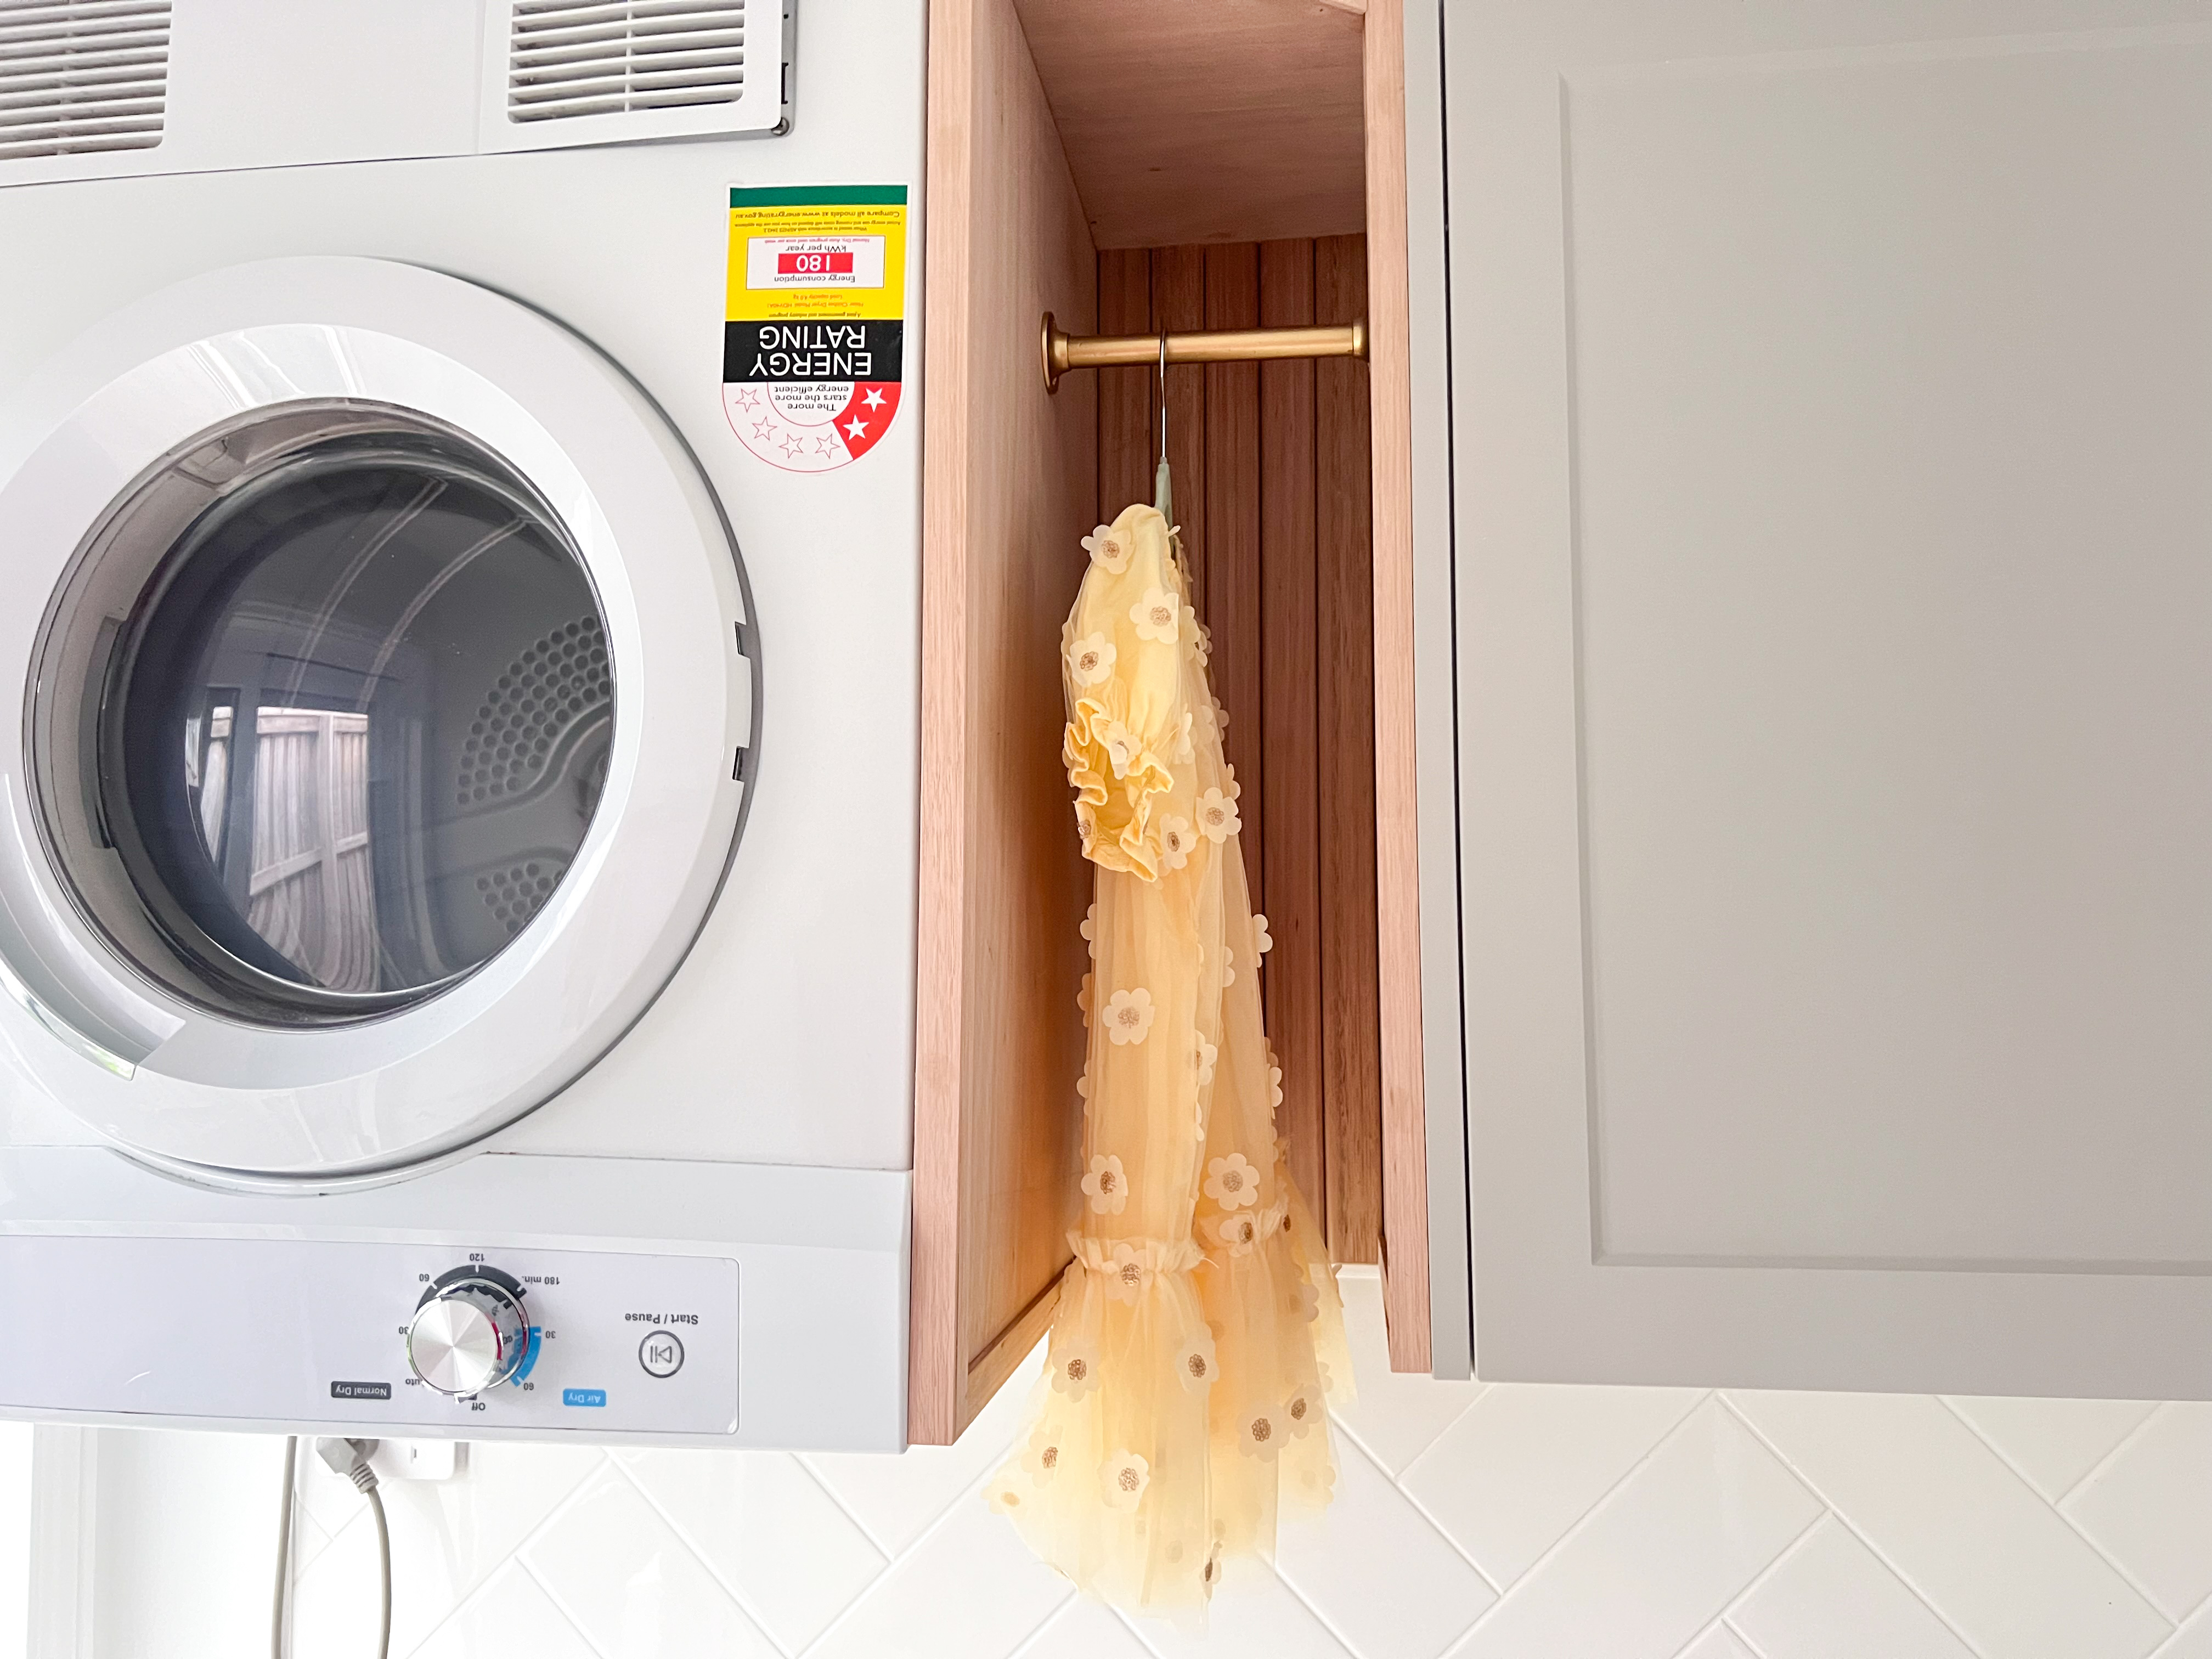
A great laundry space-saver is this Open Cupboard with Hanging Rack. Use it to fill an awkward space between cupboards or appliances. Read the step-by-step instructions below and watch the video to create your own.
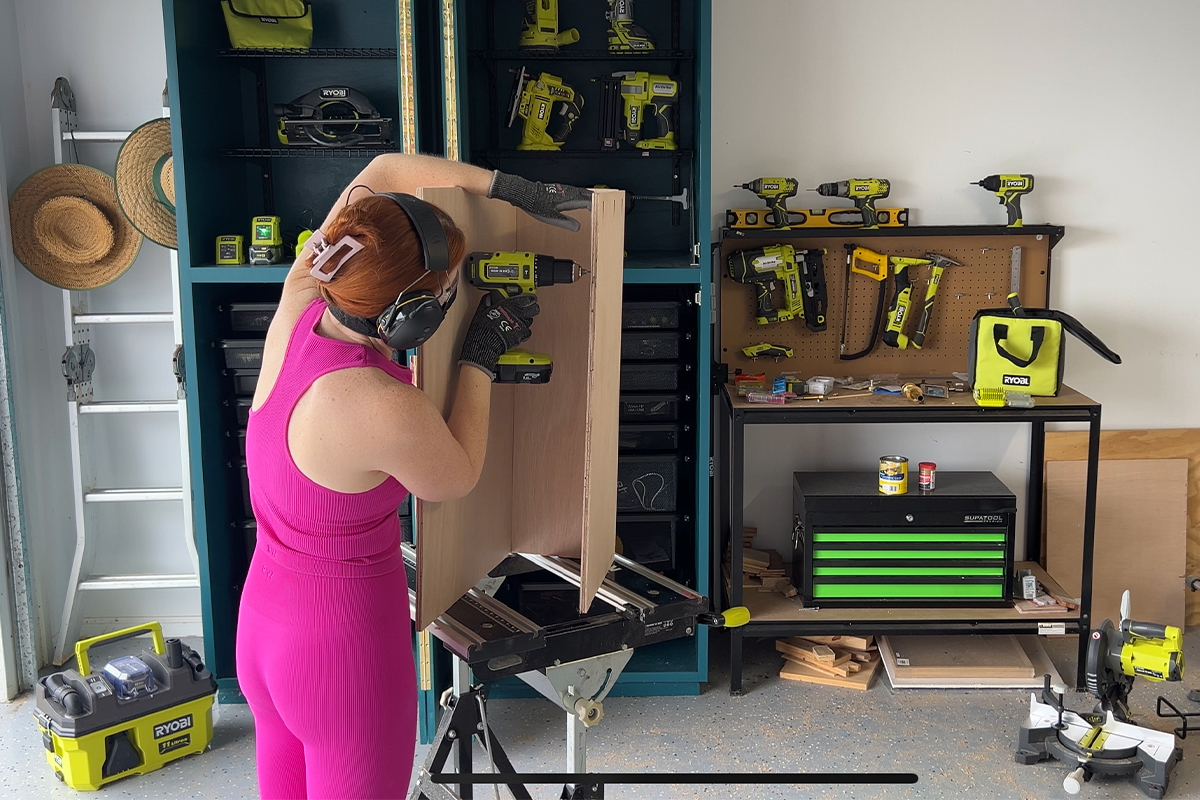
Step 1: Carefully measure the dimensions of where you want to hang the cupboard and then mark out the pieces on 12mm plywood
Step 2: Using the circular saw, cut the two sides, back and top pieces.
Step 3: Using the hammer drill, drill pocket holes on the rear sides of the back piece and then on the rear/top of the sides and back pieces.
Step 4: Using the impact driver, attach all of these pieces together
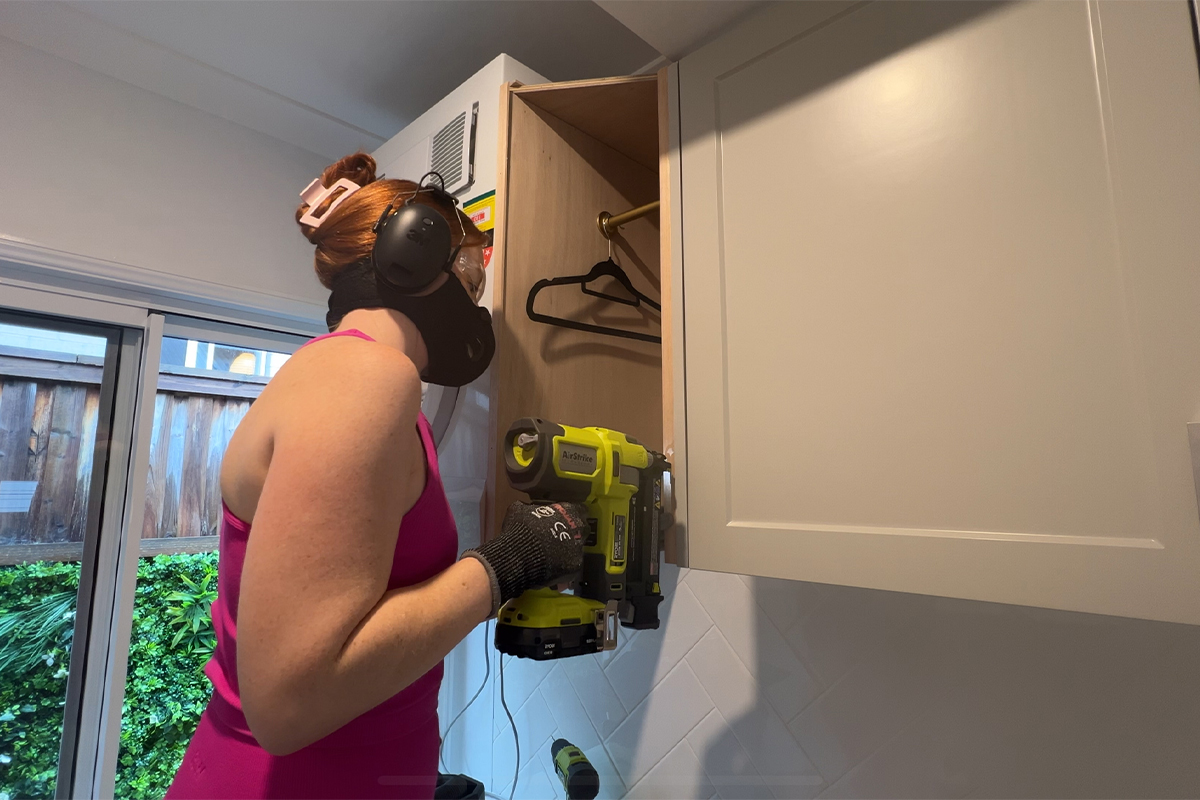
Step 5: Measure out where you want your rod to hang and the width of it.
Step 6: Using the multi-tool, cut the rod to size.
Step 7: Using the hammer drill, pre-drill the holes for the rod.
Step 8: Using the hammer drill, pre-drill the holes into the cupboard and wall – try to drill into a stud (the vertical timber framing behind the plasterboard wall. If unable, use appropriate drywall screws/fixtures). Then secure it into the wall using the impact driver or screwdriver.
Step 9: Attach the rod using either the impact driver or a hand-held screwdriver if the impact driver is too big.
Step 10: Measure out the edges that you want to cover with 4mm edging and cut with a mitre saw.
Step 11: Secure the edging with glue and the 18GA brad nailer.
Step 12: To cover up the screw in the back of the cupboard and for a nice statement, cut 40x8mm rounded edging bead to size and secure using the 18G brad nailer.
Step 13: Paint, stain, or seal.
Feeling creative but lacking ideas? We’ve got you covered! Watch our videos and follow the step-by-step instructions to unleash your creativity.


.png?w=100&itok=Md9-7E8t)


%20(2).png?w=100&itok=fEHREjki)
_ANZ-Group-shot_v2.png?w=100&itok=Z_Qi2FlQ)
_ANZ-Group-shot.png?w=100&itok=k25pq8iJ)


.png?w=100&itok=fnsLcLhG)


.png?w=100&itok=efvsqCNL)


%20Group%20shots%20(1).png?crop=yes&k=c&w=125&h=125)


.png?crop=yes&k=c&w=690&h=690&itok=J5F8BAY0)


.png?crop=yes&k=c&w=690&h=690&itok=gfFIhyAE)