


.png?w=100&itok=wKdP9svH)


.png?w=100&itok=D7d8Umfz)

.png?w=100&itok=Lj7SSICT)


Drill into timber, soft metal and hard materials including brick and concrete with the RYOBI 18V ONE+ Hammer Drill.
Is your pantry cluttered with a disorganised array of spices? We've got the perfect solution for you! Why not create your own spice rack? Follow these simple steps, and you'll soon have the ideal spot for all your spices.
Important: ensure cuts are straight to help guarantee success.
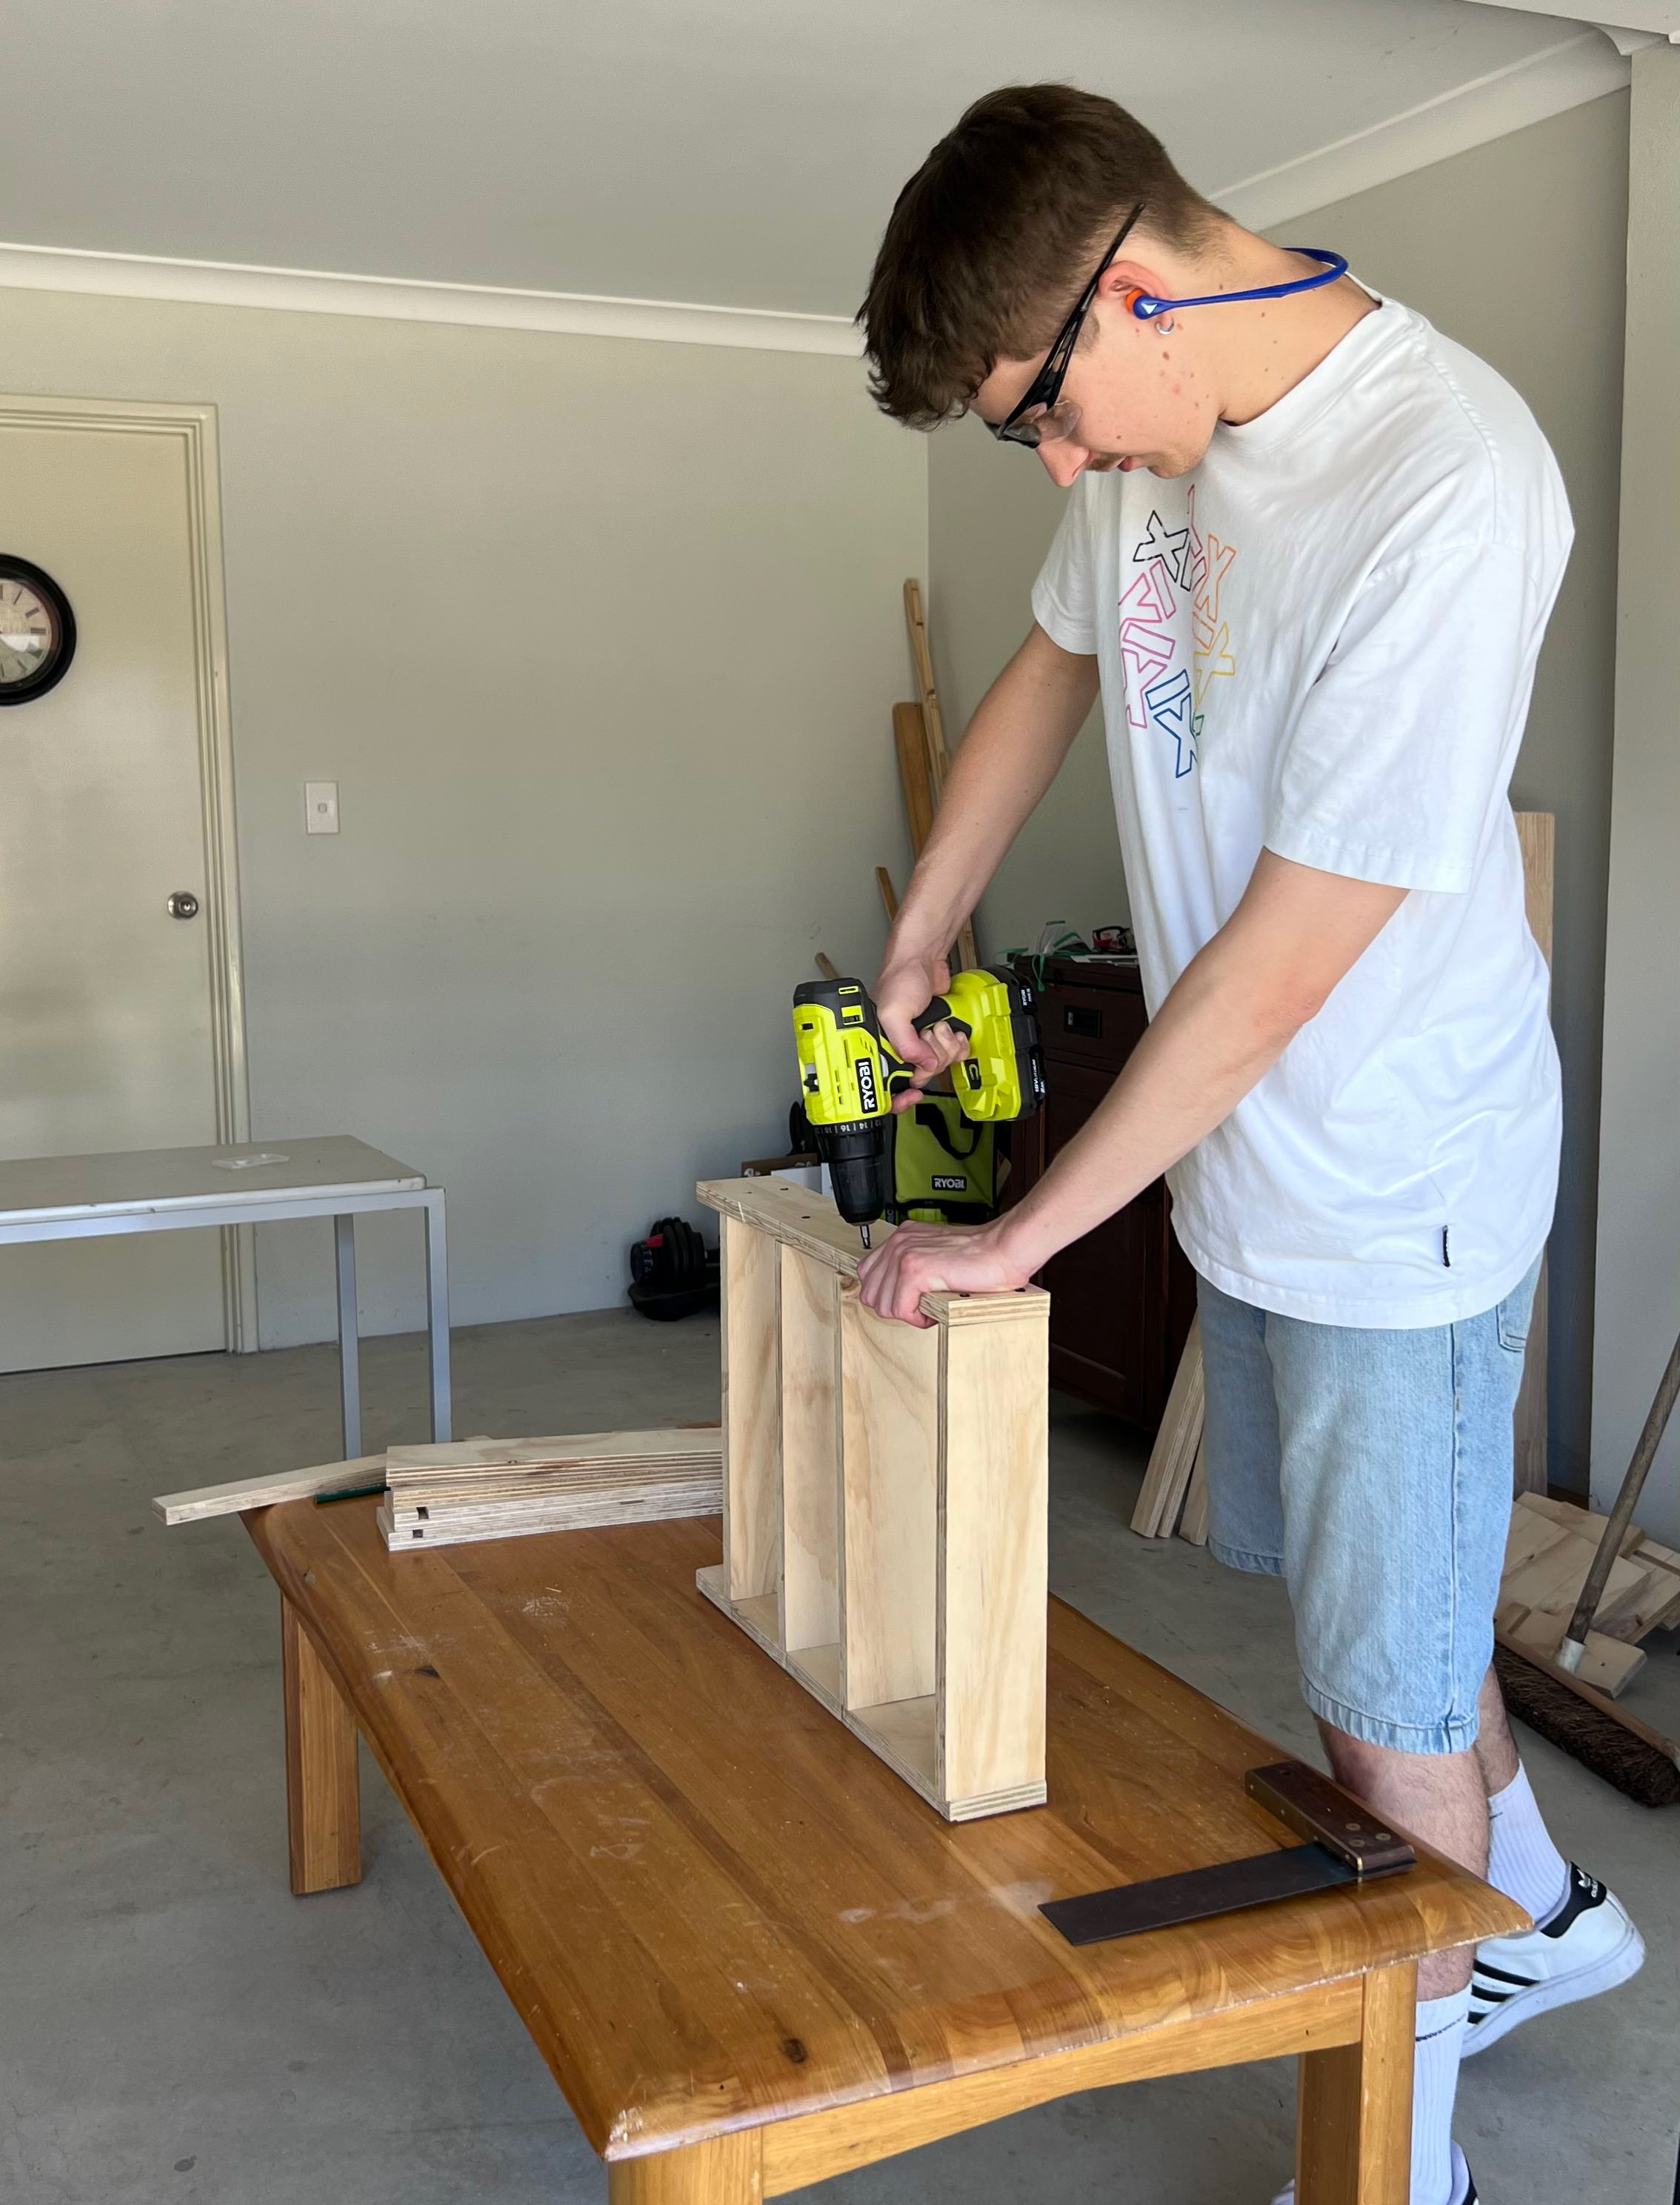
Step 1: We will build this from the bottom up, so place the two sides and one of the bottoms (see materials list above) on a level surface and drill two pilot holes on the outer edge where the two pieces meet. Drive two screws into the holes. Repeat on other side.
You now have the base of the spice rack. Check that the base is flat.
Step 2: Take the remaining bottom pieces, space the first one 200mm above the base, and the other two 130mm apart from each other. Attach with the same method as the first shelf.
Step 3: Add the backs to the shelves, ensure they are flush. Drill two pilot holes for each back and add the screws.
Step 4: Attach the front pieces, ensuring they are flush with the shelves. Use only one pilot hole and screw on each side of the shelf.
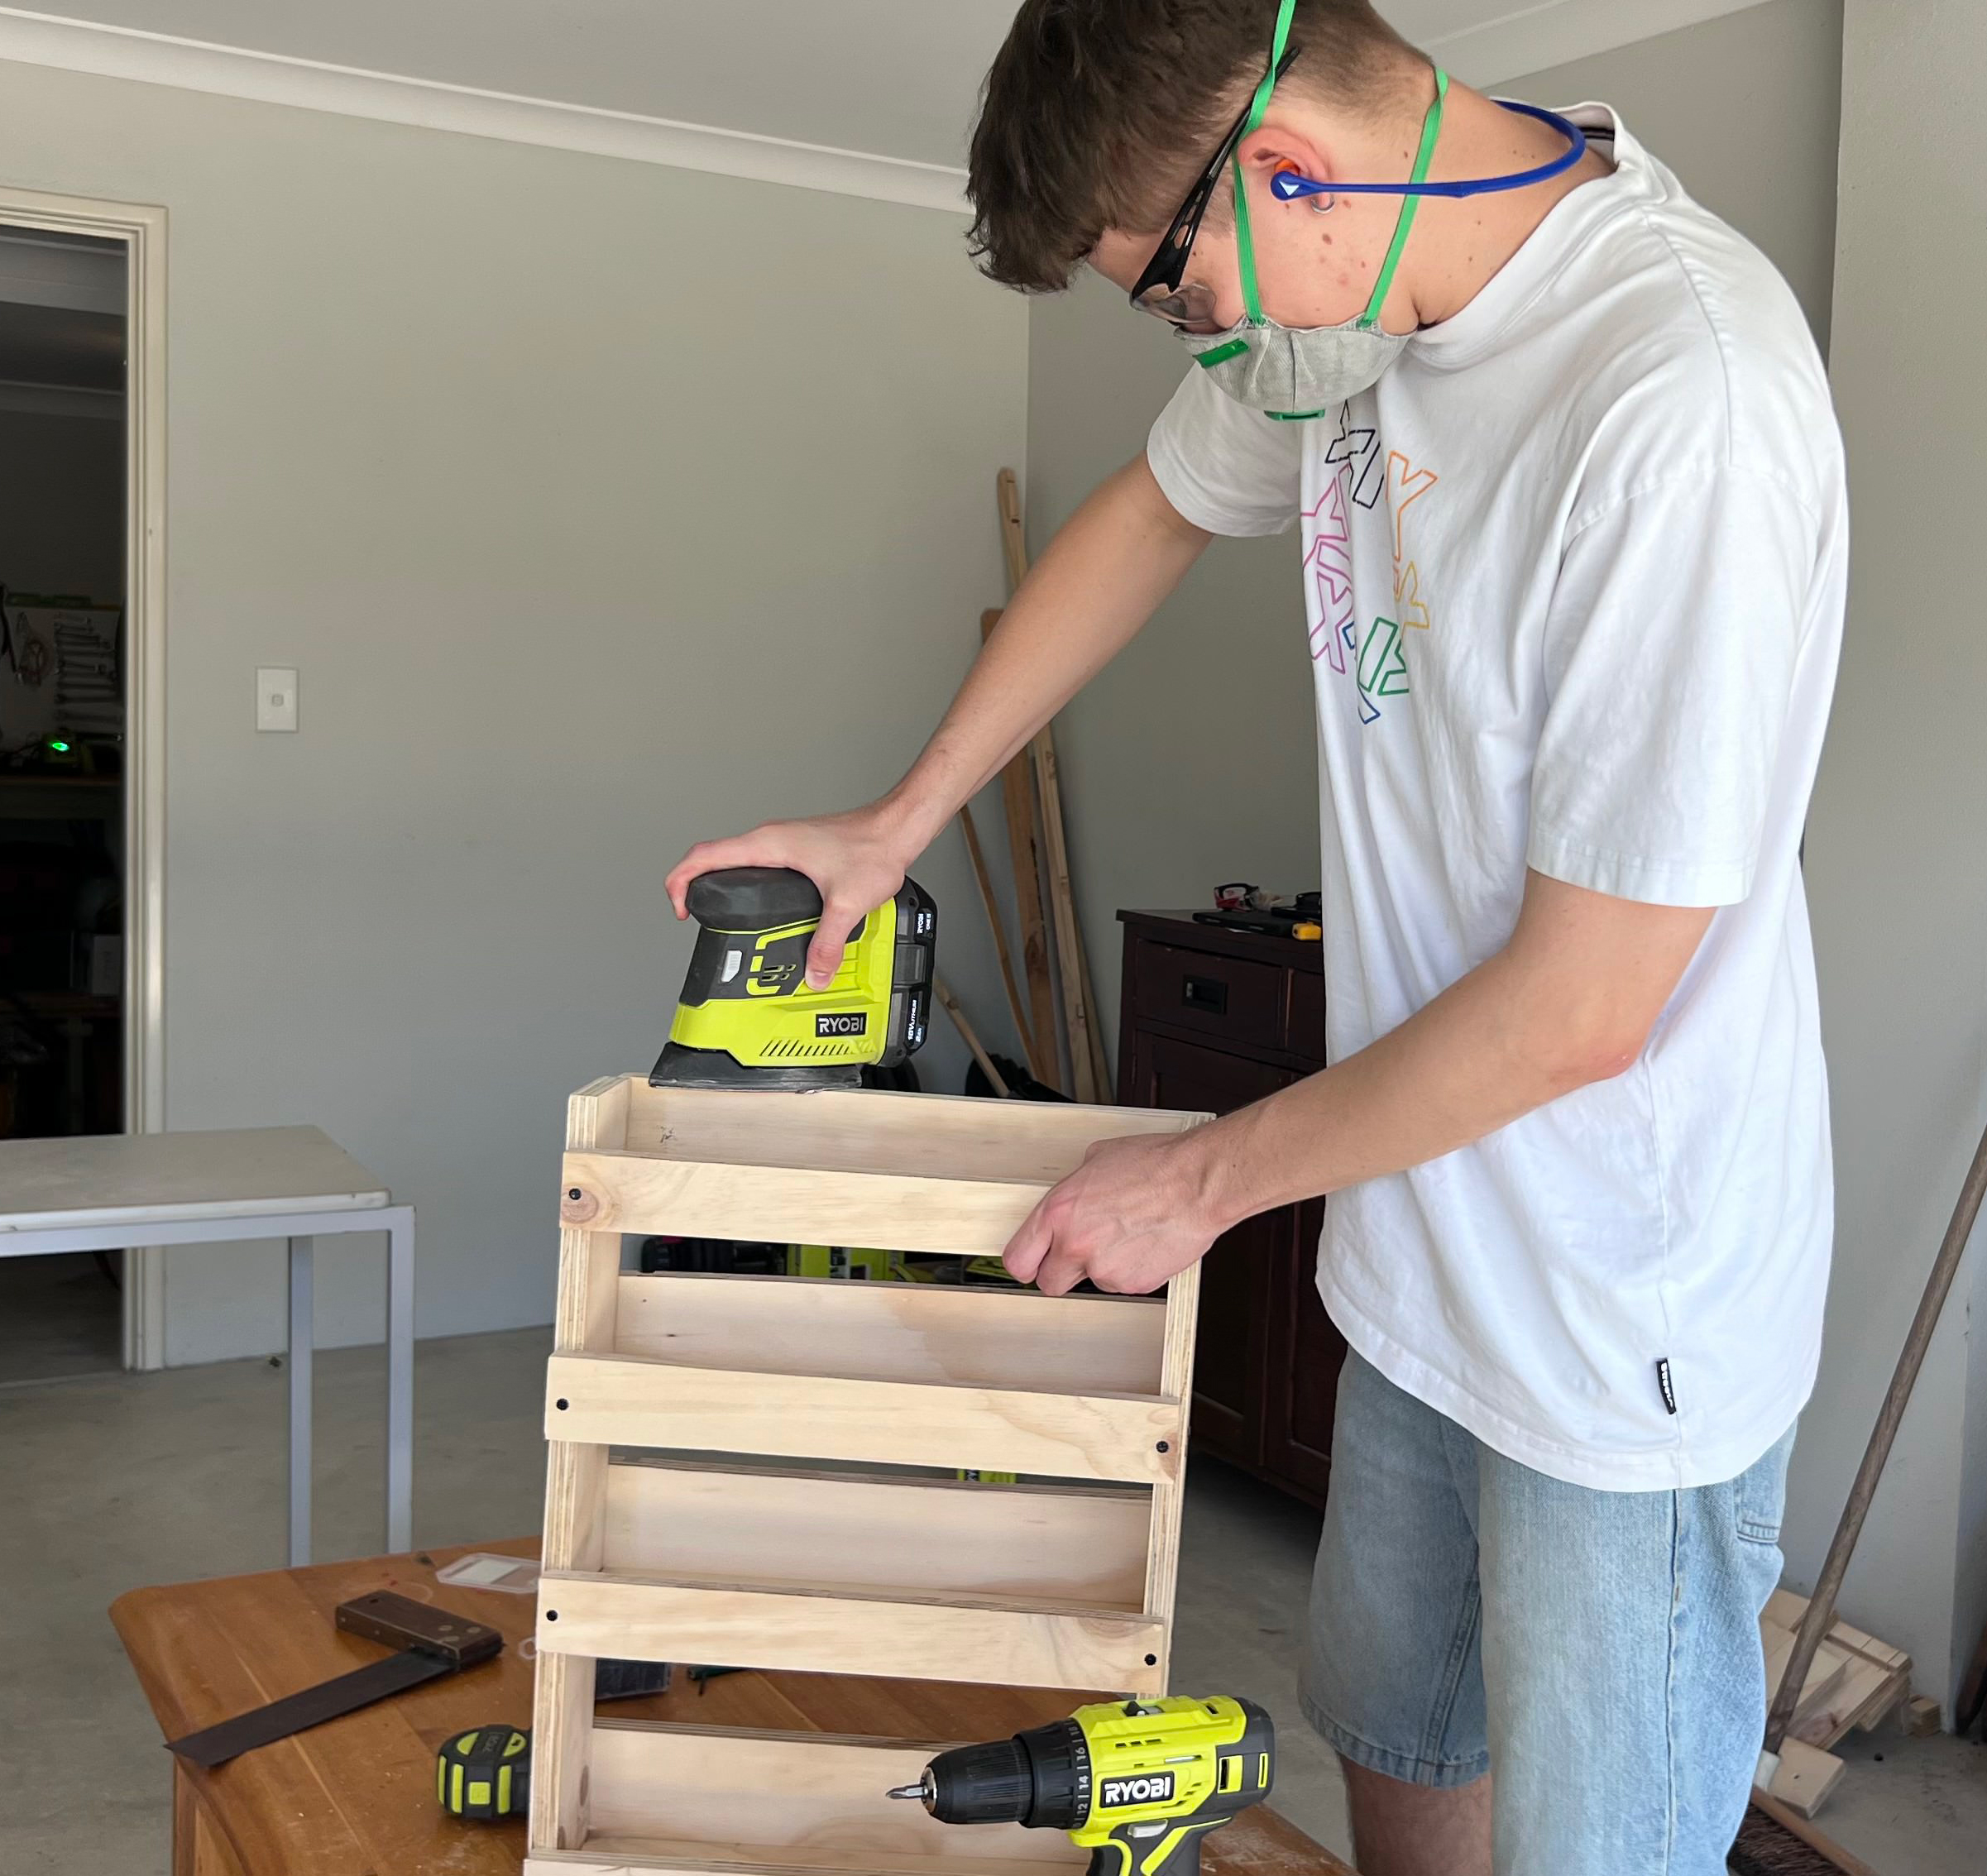
Step 5: The foundation for the rack is complete, sand with 120 grit sandpaper, and then 240 grit using a Detail Sander, which is great for getting into hard-to-reach areas.
Step 6: Once you are satisfied with the result choose a varnish or stain of your choice and brush it on and leave to dry overnight! There you have it, an organised spice rack.
Feeling creative but lacking ideas? We’ve got you covered! Watch our videos and follow the step-by-step instructions to unleash your creativity.


.png?w=100&itok=Md9-7E8t)


%20(2).png?w=100&itok=fEHREjki)
_ANZ-Group-shot_v2.png?w=100&itok=Z_Qi2FlQ)
_ANZ-Group-shot.png?w=100&itok=k25pq8iJ)


.png?w=100&itok=fnsLcLhG)


.png?w=100&itok=efvsqCNL)


%20Group%20shots%20(1).png?crop=yes&k=c&w=125&h=125)


.png?crop=yes&k=c&w=690&h=690&itok=J5F8BAY0)
