HOW TO INSTALL YOUR RYOBI LINK SYSTEM
This guide will provide step-by-step instructions on how to install RYOBI LINK Rail/s on a plasterboard or brick wall.
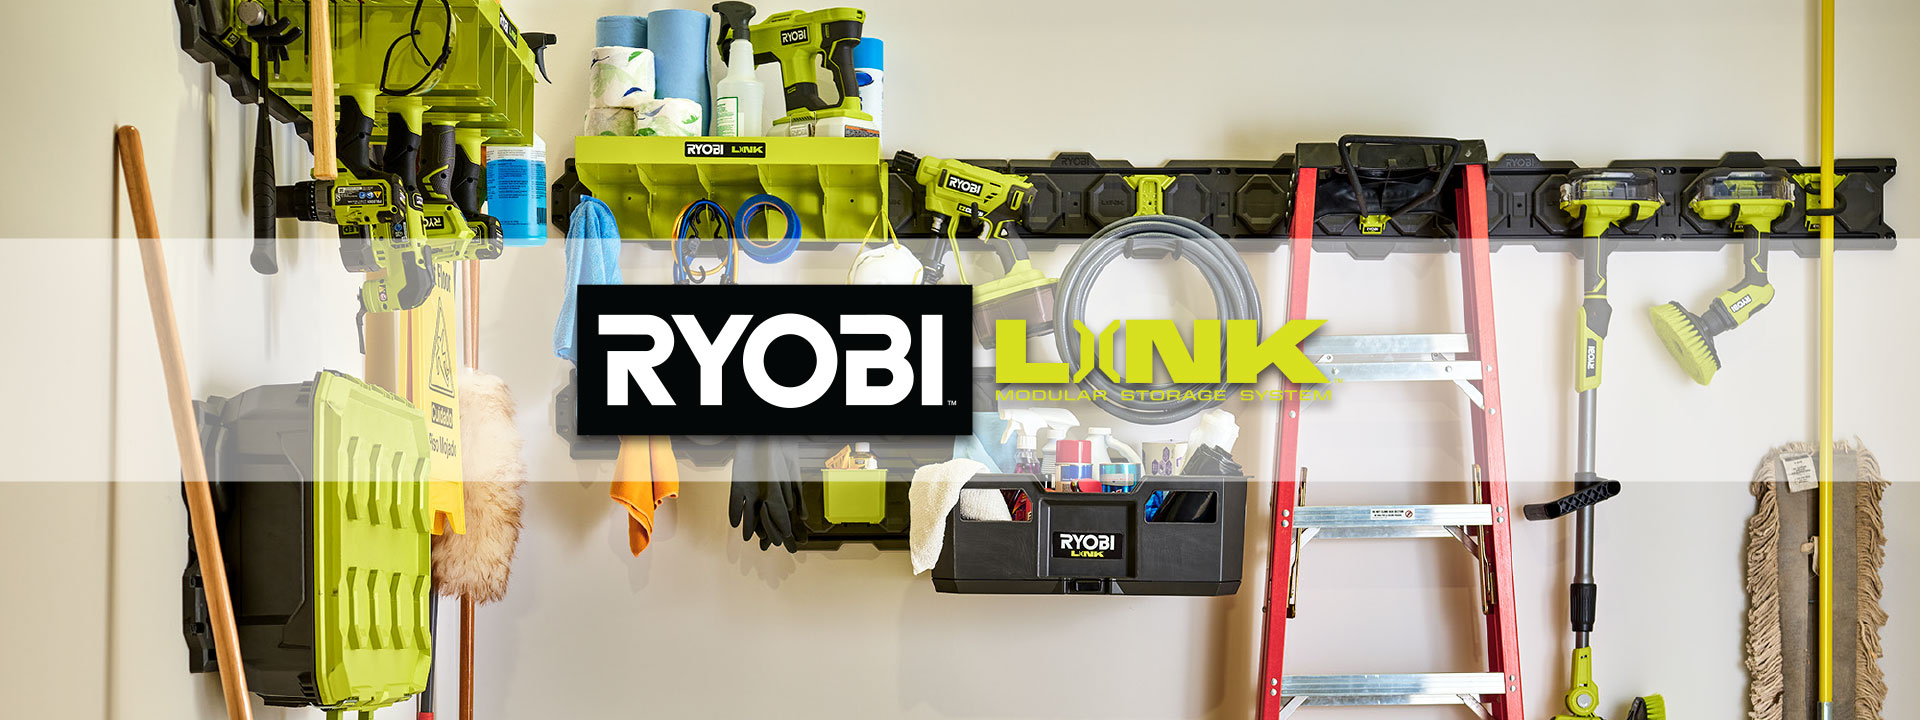
There are plenty of storage and racking solutions available today, but none are as easy, secure and changeable as RYOBI LINK.
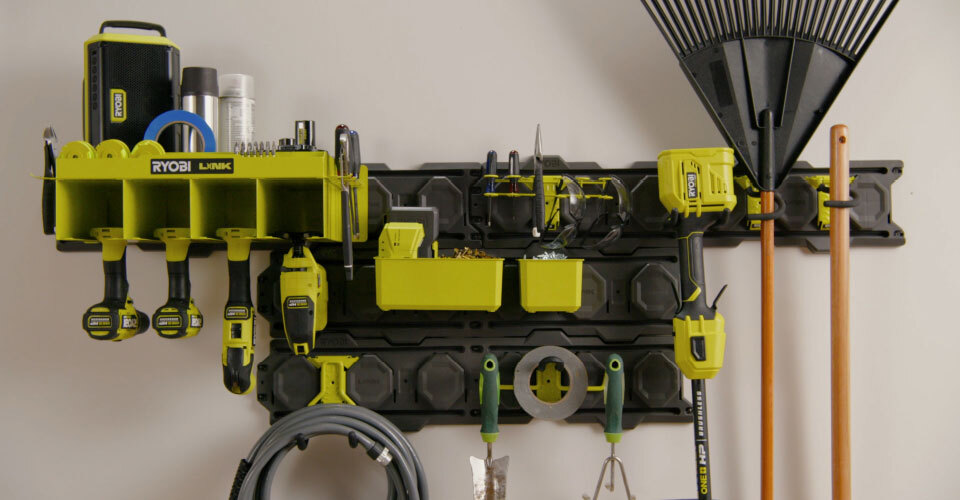
Once you’ve decided what you want to store and you’ve purchased enough wall rails, hooks, hangers, tubs and rolling storage to house your items, find a space on your wall that will adequately hold them all.
A good tip is to allow a bit of extra room on your wall for future expansion as we’re sure you’ll find LINK is the perfect solution for storing all types of gear.
There are plenty of storage and racking solutions available today, but none are as easy, secure and changeable as RYOBI LINK.
Once you’ve decided what you want to store and you’ve purchased enough wall rails, hooks, hangers, tubs and rolling storage to house your items, find a space on your wall that will adequately hold them all.
A good tip is to allow a bit of extra room on your wall for future expansion as we’re sure you’ll find LINK is the perfect solution for storing all types of gear.
INSTALLING LINK RAILS ON A PLASTERBOARD WALL
A standard plasterboard wall consists of vertical timbers, known as studs, which are centrally spaced apart between 400mm and 600mm, spaced apart by noggins.
Plasterboard sheets are then fixed to the frame.
LINK rails are then secured to the wall with a combination of screws directly into one or two studs and wall anchors into the plaster board.
It’s important that roughly the centre of each rail is fixed to at least one stud for maximum holding strength when two studs can’t be found. One stud is the minimum requirement.
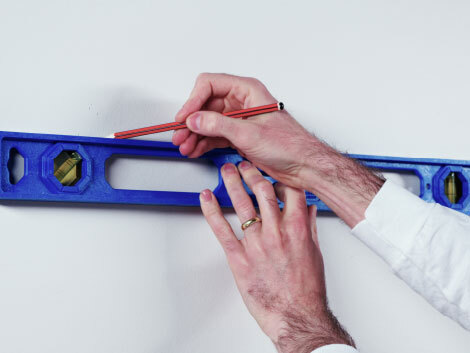
STEP 1
Using a spirit level to draw a pencil line on the wall at the height you wish to install the first rail.
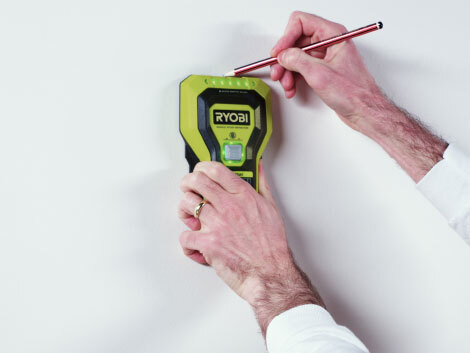
STEP 2
Use a stud finder along that line to locate and mark the vertical timber studs behind the plasterboard. Start by marking 2 or 3.
This is where you will screw in the first 1 or 2 rails of your system.
TIP: To avoid costly damage, or personal injury, it is good practice to check what utilities may be behind the plasterboard wall, like electrical wires or plumbing pipes.
This is where you will screw in the first 1 or 2 rails of your system.
TIP: To avoid costly damage, or personal injury, it is good practice to check what utilities may be behind the plasterboard wall, like electrical wires or plumbing pipes.
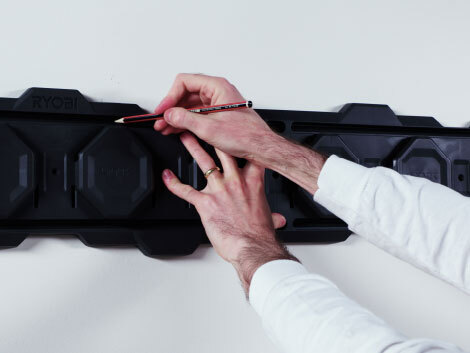
STEP 3
Place the first rail against the wall along the horizontal line you drew. We recommend it spans 2 studs. Mark on the rails where the studs are located.
NOTE: You may have to drill new holes in the channels to attach the rails to the timber studs.
NOTE: You may have to drill new holes in the channels to attach the rails to the timber studs.
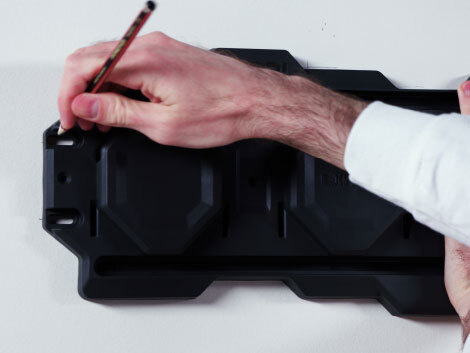
STEP 4
Each rail also has screw holes on the far left and far right. Mark these, too, on the wall.
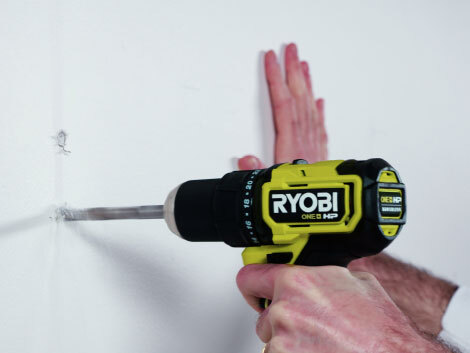
STEP 5
Remove the wall rail and drill 9mm holes through the left and right marks.
NOTE: These holes are for the plastic wall anchors (supplied) and should not be screwed into studs.
NOTE: It’s important that these holes are exactly 9mm so that the anchors fit tightly into the holes and don’t spin when screwing in the fasteners later.
NOTE: This applies to the first rail.
NOTE: These holes are for the plastic wall anchors (supplied) and should not be screwed into studs.
NOTE: It’s important that these holes are exactly 9mm so that the anchors fit tightly into the holes and don’t spin when screwing in the fasteners later.
NOTE: This applies to the first rail.

STEP 6
Insert the wall anchors into the holes.
TIP: Use your fingers to squeeze and press the anchor into the pilot hole. Tap the head of the anchor lightly with a hammer until it is flush with the wall.
TIP: Use your fingers to squeeze and press the anchor into the pilot hole. Tap the head of the anchor lightly with a hammer until it is flush with the wall.
STEP 7
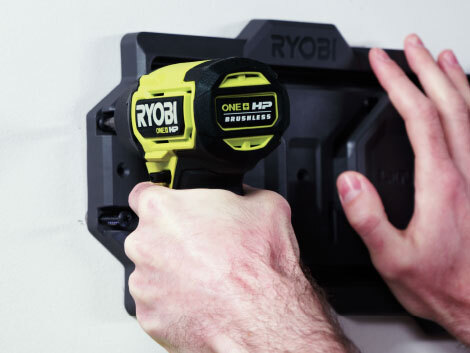
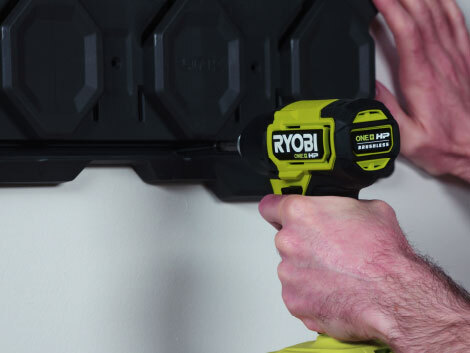
Place the wall rail back on the wall in the same location as before and secure each end of the rail by fixing the screws into wall plugs.
STEP 8
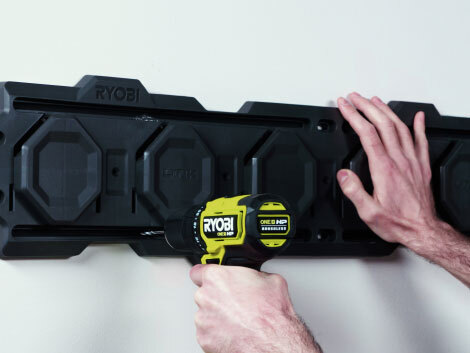
Next, drill 3mm holes in the middle lower and upper installation channels of the wall rail where you marked the location of the studs.
STEP 9
Secure the wall rail to the studs using the provided screws.
STEP 10
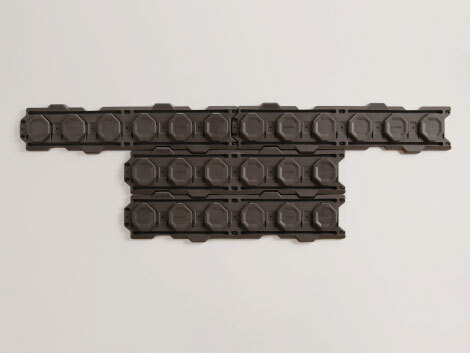
Subsequent rails can be added to the first rail in a number of configurations.
NOTE: Just remember to ensure each rail is secured to at least 1 timber stud.
NOTE: Just remember to ensure each rail is secured to at least 1 timber stud.
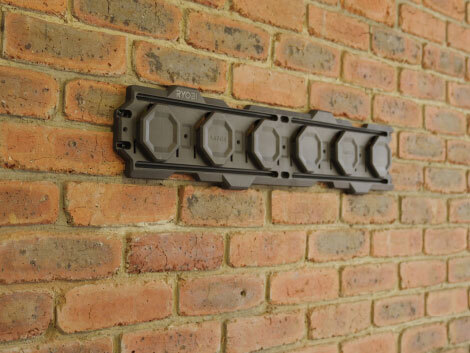
INSTALLING LINK RAILS ON A BRICK/MASONRY WALL
This guide will provide step-by-step instructions on how to install RYOBI LINK Rail/s to a brick wall.
Standard brick walls are constructed of solid or semi-hollow bricks secured into position with mortar. Each layer of bricks and mortar is called a course. The bricks on each course are offset to increase strength.
Secure the LINK Wall Rails to the wall with screws driven into nylon plugs that have been inserted into the wall (follow installation steps below). The screws expand the plugs as they are driven to secure the rail at each point.
Note: Avoid drilling holes into the mortar as it will most likely crumble and increase the diameter of the hole, making the nylon plug ineffective in securing the rail.
To install link rails to the wall you’ll need these tools:
Pencil or Marker
Hammer
Hammer Drill/Driver
Impact Driver (optional)
#2 Phillips Hex Bit
#2 Phillips Screwdriver
30mm Green Masonry Wall Plugs
6.5mm Masonry Drill Bit
Supplied Rail Screws
Appropriate PPE
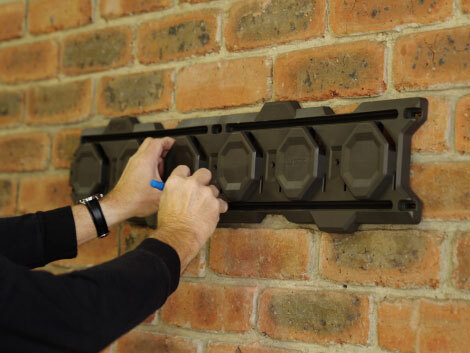
STEP 1
Position your first rail parallel to the brick course and where you can align the 6 mounting holes over bricks and mark them.
NOTE: The brick course should be level, but you can doublecheck with a spirit level.
NOTE: The brick course should be level, but you can doublecheck with a spirit level.
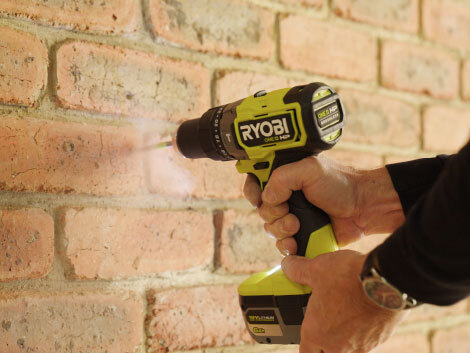
STEP 2
With your drill set to hammer mode and highspeed, drill holes at each mark with the 6.5mm masonry bit 35mm deep.
TIP: Always start slow and maintain forward pressure to avoid the drill bit slipping off the mark.
Regular withdraw the drill bit while making the hole to help clear the debris.
TIP: Use masking tape around the drill bit at 35mm to act as depth guide.
TIP: Always start slow and maintain forward pressure to avoid the drill bit slipping off the mark.
Regular withdraw the drill bit while making the hole to help clear the debris.
TIP: Use masking tape around the drill bit at 35mm to act as depth guide.
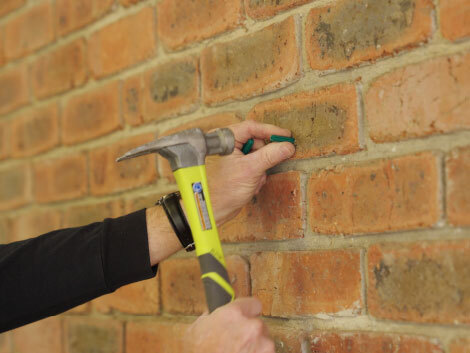
STEP 3
Insert a green wall plug in to each of the 6 holes by tapping them in with a hammer.
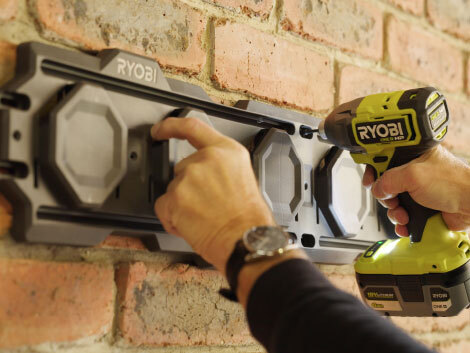
STEP 4
Reposition the rail back on the wall and secure it into place using the supplied screws.
NOTE: Should you require different length screws, these need to be 10Ga flat head suitable for nylon plugs.
NOTE: Should you require different length screws, these need to be 10Ga flat head suitable for nylon plugs.
STEP 5
Repeat the process for each additional wall rail using the tabs to align additional rails left right above and below.
Watch the Installation Video
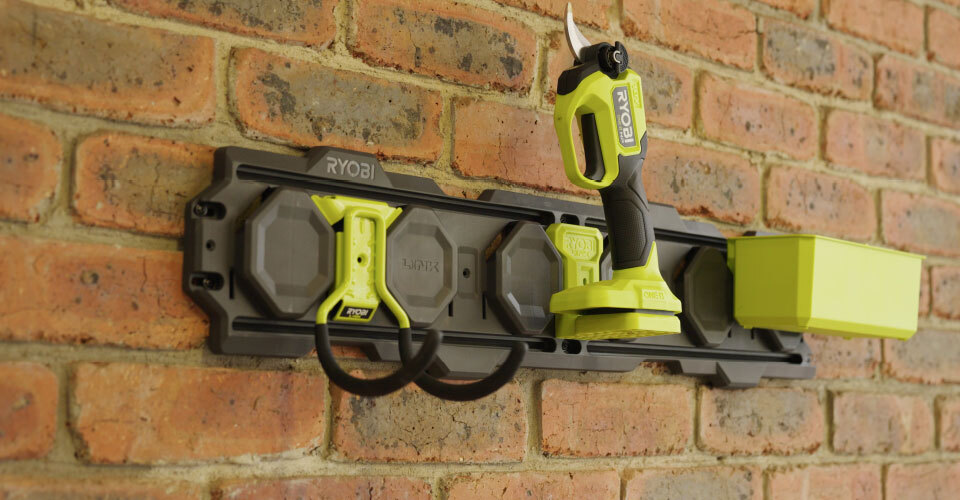
ATTACHING/REMOVING LINK ACCESSORIES
Position the LINK accessory between two of the raised octagonal patterns on the wall rail by inserting the tabs on the accessory into the openings on the wall rail.
Push down firmly on the LINK accessory to secure it in place.
If you wish, insert an M5 30mm screw through the centre of the accessory into the wall rail to secure it.
Don’t worry if you change your mind about the location of the accessory. To remove it, unscrew the screw, then simply slide the accessory up and away from the wall rail.
IMPORTANT INFORMATION
IMPORTANT: To avoid costly damage, or personal injury, it is good practice to check what utilities may be behind the plasterboard wall, like electrical wires or plumbing pipes. It may be best to consult a tradesperson who can check for you without causing any damage to the walls.
Before you start, you must mount the wall rails to sound structural supports, like timber studs, with the screws and/or plugs provided with the rails.
Without this structural support the wall rails could detach from the wall, resulting in equipment damage and potential serious personal injury.
The wall rails should be mounted on smooth, surfaces capable of bearing the weight of wall rails and the items to be stored on it.
The maximum weight of all the items placed on each wall rail must not exceed 94 kg. Do not exceed the maximum weight capacity for the wall rails or LINK accessories.
Ensure the wall rails are securely mounted. Make sure they do not rock, slide, or move before storing products or tools.
These are hanging wall rails. Do not use for any other purpose than supporting tools or products. To reduce risk of injury, do not use accessories that are not specifically designed and recommended by the manufacturer.
Do not use the wall rail if it is damaged or broken. A damaged or broken wall rail may not mount securely and/or it might not provide adequate support for the items stored on it.
Featured Products
-
star_outlineAdd to My WishlistLINK™ 15-Piece Wall KitRLWK15★ ★ ★ ★ ★ ★ ★ ★ ★ ★ (13)
$239
-
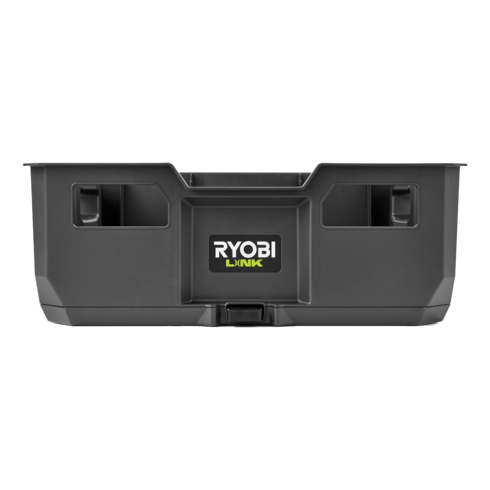
star_outlineAdd to My WishlistLINK™ CrateRLCR★ ★ ★ ★ ★ ★ ★ ★ ★ ★ (0)
$69